New Space Update #1

Update

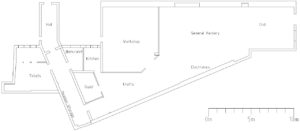
After gaining access to the new space we set about actively working out the floor layout using ticker tape.

The overall impression is that the new space is large and to allow for growth the area of the workshop has been increased, the workshop also needs to be separated fully from the space (due to noise, dust, etc).

tumblr_o8yqoxRa9H1vxbmv2o1_1280

Proposed layout of new space

The other areas of the space are aiming to be more open plan and adaptable unless they have a dedicated function – we are looking as much as possible to incorporate storage into the design of the place – a tidy space is a functional space, get your thinking hats on for any creative options!

spacedesigns

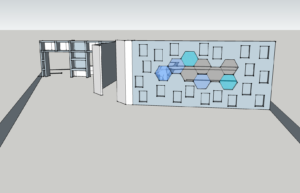
My rough idea for the workshop partition wall – windows + storage bits.

We are hoping that members will contribute as much as possible to the design and renovation of the new space so feel free to start drumming up ideas for sub projects that could be executed. I.e. Have a great idea for that dividing wall? Own the project! Start a google group thread or setup a time to meet and discuss it with other interested people!

Hopefully these sub projects can then pool materials and transport requests with other projects, getting many elements of the build going with less waste.

Phil’s blog over at http://stuffphilmade.tumblr.com/ covers most of the particulars so far in the new space very well. Thanks Phil et al.!

Next steps

We are still working on making the new space ‘safe’ for members to visit more regularly, this includes:

  • Security / access – changing the doors and access to the space from keys to RFID. We have to work out a mechanism to allow this to happen on the metal gate bars which would be a shame (and risky!) to remove.
  • Fire exits and signage (requires communication with enterprise next door)
  • Asbestos register update – we’re going to get someone in before any major works to check out the new space as part of the regulations for refurbishments.
  • The big decide – should we make good the ceiling space above the suspended ceiling? Its a large job but its one of the very few that could only reasonably be done now without disruption.
  • The electricals – immediately identified as something that will have a big finance weight behind it, but we really are committed to getting away from extensions in extensions. Currently the state of the electricals are enough for the build, but nothing else. The progress on the layout plans has made planning the install simpler (leaning towards surrounding the space with dado with some separate breakers for areas that need it). There also is 3 phase into our unit already.
  • Project Management moving forward – ideally going to get everything tasked into sub-projects that can be OK’ed and be given materials centrally; this should help with clearing communications up a bit and getting the ball rolling in various areas in the right order.

Wrap up

Regular roundups can occur every Tuesday on the open night for people who miss the online communications.

Getting pictures of the build process will always be great!


Posted in Blog, LHS Update | Leave a comment

Spacey McSpaceface

News

You might have seen that we have recently been looking to move the Hackspace. As of TODAY I can confirm that we have an agreement lined up, it has been signed and Spacey McSpaceface (official name) is a GO!

The new space is bigger, which means that the new rent is higher – but we have tirelessly negotiated a very good deal on a 7 year lease with a breakpoint at 3 years. We also have a generous 3 month free rent period as well as a lease that lets us alter to our hearts content!

However the cherry on the cake is that its not a particularly difficult or far move, as the unit we’ve signed up for is just around the corner!

We are planning to have as little crossover time between the two spaces as possible; but we expect it to be around a month. If you are feeling particularly like you want to obtain your leadership badge we are looking for MOVE COORDINATORS that should roughly align with one area of space activities.

Now onto the FUN STUFF

Address

Unit 14, Sheepscar House, Sheepscar Street South, Leeds, LS7 1AD

Is it a good space?

TL;DR YES.
The new space is within budget (sustainable with 50+ members) We are taking approximately 2100+sq ft of space for £800 pcm. The Landlord has been very proactive pre-agreement to do some work to make the space better, new skylights have been installed and the walls have been made good. The 3 month rent free period allows us to do a lot of improvements to make it a far better standard than the current space. Volunteer now!

Essential stuff in a space

Minimum Viable Product: these are the things that we must have in order to function as a space:

  • Toilet facilities — at present there are two toilet rooms, one will need to be removed and the one at the back needs cleaning to a good state.
  • Running water – the removed toilet will create a wet and kitchen space with access to running water and drainage already in place.
  • Electricity – the distro is in the main room and some electicals are in place. These will do for now whilst we construct any dividing walls and the new space layout – at which point we will then properly balance phases and re-wire the whole space.
  • Ability to fit internet — decent internet lets us do internety things.
  • 24 hour access – a few locks and doors needs replacing to enable this – the current plan is for two door systems will be run in conjunction as soon as the new space is safe for access.
  • Centeral location – its only a few minutes away from the current space.
  • External walls for fume extraction  — The roof is above us and two small external inlets connect all the rooms.
  • Minimum term for lease: 3 years.

Preferred stuff in a space

Make the space better for all. For the space to better we want to consider the following:

  • Disabled access – the new space is ground floor only.
  • Own street door (person sized) – the new space features a double wide front door and separate access shared with enterprise – this is subject to change to improve security.
  • Heating — not yet. We do plan to get electrical panel heating that is zoneable.
  • Insulation — no, however, the drop ceiling could be insulated ‘easily’ and the two sides are enclosed by enterprise with thick walls.
  • Natural light – skylights synergy skylights! As well as some front windows.
  • Car parking – not so much during the day, but evenings should not be an issue. There is plenty of parking around the area if you cant get into the gated compound.

What does it look like now?

Photo Sphere before

What will it look like?

This is all ‘up in the air’ but the general layout idea can be seen here:

Image of Floorplan

The general idea is to increase facilities (both utilities and teaching) and increase workshop-type space to keep projects and working separate from the other areas of the space.

When is it all happening?

We get first access on the 17th June so the official move will be Late June to July. There’s lots do do. Moving will be an enormous task, and will take several weekends (and probably a few weeks worth of time in preparation).

Resources that help us coordinate this will be released soon – most likely on the wiki and in a google sheets.

Planning meeting

A general hype meeting will occur on 14/06/2016 at 8pm – don’t feel bad if you can’t make this its really just a kick off to decide if we have missed anything vital.

Posted in LHS Update | 1 Comment

Space Update #2

It’s been over a week since the last update – here’s what’s going on with the Hackspace.

  • We really need your input on the move – please take a look at the mailing list thread covering the latest developments with regards to the contract and negotiations.
  • HSBC has completed the instructions to diversify and secure the access to the bank account. Two signatories are now required to complete major transactions at the bank.
  • There’s a cold drinks vending machine coming! Don’t worry though, nobody will have to carry this 350 kg beast up the stairs. It will be stored securely at ground level while it is waiting for its new RFID compatible heart.
  • Joe has made a run to Makro – all your favourite drinks and snacks are back in stock again. Is there anything missing? Stick an entry on the wiki page if there’s something you’d like to see.
  • Hey what about that CNC Mill? There’s a batch of end mills winging their way from China for use in the CNC mill inductions. We’ve made the machinable wax, we are getting a space set of universal hold downs (so vital!) and now we just have to wait for the state-subsidised postal service to do its thing. More updates to come on this!
  • A total of 100 linear metres of sandpaper has been acquired in 40 and 100 grit, along with a selection of similarly coarse sheets. The finer grades are still going strong from last year!
  • The new design website is moving into the next phase where it should all get tied together and launched; expect alot more member-centric functions where your account on the website will let you place projects for all to see, as well as better clarity on where our information is stored and presented like the wiki, group announcements and documents!
Posted in LHS Update | Leave a comment

Space Update #1

We make a lot of decisions behind the scenes to keep the space running, and there’s no easy way to keep you up to date with what’s going on without cluttering up your inbox.

Here’s a short update covering what’s going on:

  • Samwise is putting the final touches on the agreement with the landlord and letting agent for the new space. We’re looking into the possibility of opening extra skylights up to spread the natural light love. The cost for this (subject to quote) would be split between the landlord and ourselves. We might also be able to put flag pole and flag on the roof. Get involved with the discussion on the mailing list  and keep an eye out for more details soon.
  • Martyn is taking the provisional tenancy agreement for the new space to a solicitor to make sure we haven’t missed anything.
  • Aidan & Joe have taken a look at the responses to the spending plan questionnaire we sent out the other day. We’ve collated the suggestions and we’ll be sending another email soon to get more input.
  • We have newly renewed liability insurance, covering things like the classes and workshops as well as other activities. More information is posted above the sink.
  • Banking processes at the Space have been massively improved.

Check back here regularly for more news!

Posted in LHS Update | Leave a comment

Making machinable wax

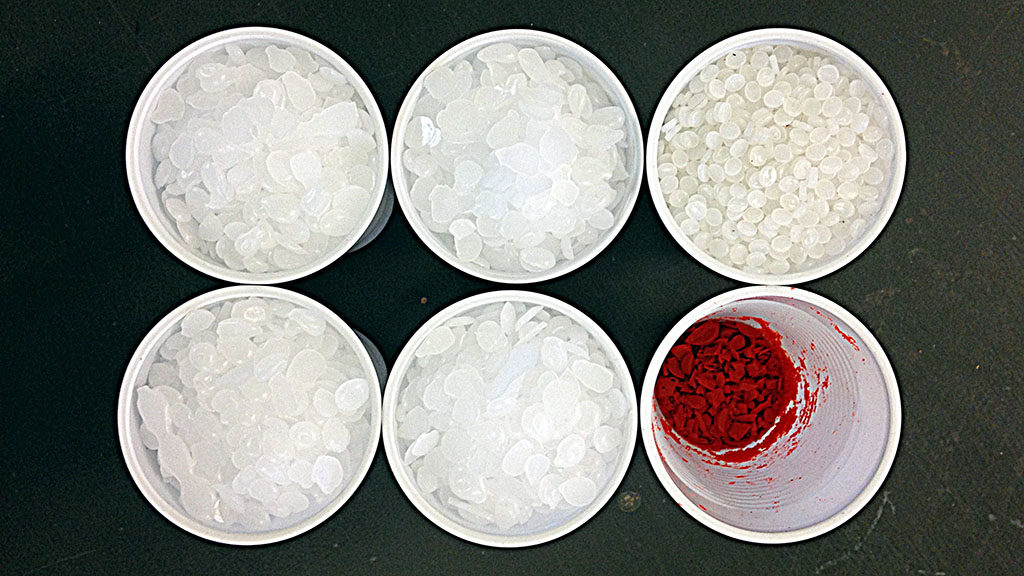
Materials - 4 parts paraffin wax, 1 part LDPE, orange wax crayon

Warning: This stuff is literally hotter than boiling water and if you don’t pay close enough attention and let it get too hot it can catch fire simply because it didn’t like the way you were looking at it.

Always be incredibly careful, have a fire blanket nearby (not a fire extinguisher) and try not to breath any fumes that come out of the fryer. Working outside would be a good idea.

CNC machining has a steep learning curve. To help everyone get the most out of the new machine we’re making some machinable wax – paraffin wax with plastic (LDPE) mixed in – to use during inductions and for test cuts.

There are many advantages to using machinable wax. It’s cheap, easy to cut, holds a nice finish and the chips can be recycled by melting into new blocks when used up. The disadvantage is that it can be quite expensive. Which is where DIY comes in.

Tools - Deep Fat Fryer, Lunch boxes from Clas Ohlson, Ladle

Ignore. Fail. Read. Succeed.

The cheapest deep fat fryer from Argos was acquired (at a cost of £13, 422/7906) along with some plastic lunchboxes and a ladle from the curiosity that is Clas Ohlson. I’d recommend skipping these, to be honest: the tupperware didn’t have a flat bottom and I broke the ladle.

We’re using the machinable wax recipe from instructables, which calls for 4 parts paraffin wax to 1 part plastic. In this case, we are using LDPE pellets from eBay and paraffin wax from the local Fred Aldous.

LDPE pellets slowly melting

LDPE pellets slowly melting

The wax melts almost instantly but the plastic pellets take a lot longer to disintegrate. Forming a gloopy mass in the bottom of the fryer careful stirring is needed to speed up the melting process – careful in order to not scratch the non stick with the poorly chosen implement, and more importantly because the wax and plastic is a skin-searing 130 °C.

After about 45 minutes of ‘gentle’ heating the LDPE and the wax have become one. The entire mixture is noticeably thicker than the original melted wax but nowhere near as lumpy as when the plastic was still melting. The texture is somewhat homogenous at this stage as well.

Mixing in the orange wax crayon

Now’s the time to add the colouring. Orange wax crayon looks pretty bad-ass, but we literally have an entire rainbow of colours to choose from next time. This wasn’t quite thought through entirely though as when we come to melt scraps from different batches together we will inevitably end up with brown.

Once mixed thoroughly, it’s pour time. There aren’t any photos of this stage for obvious reasons but in the end I gave up with the ladle and poured straight from the unplugged fryer. As long as you commit with the pouring it’s easy to get a good flow of boiling hot molten wax into the moulds.

Molten machinable wax cooling in trays

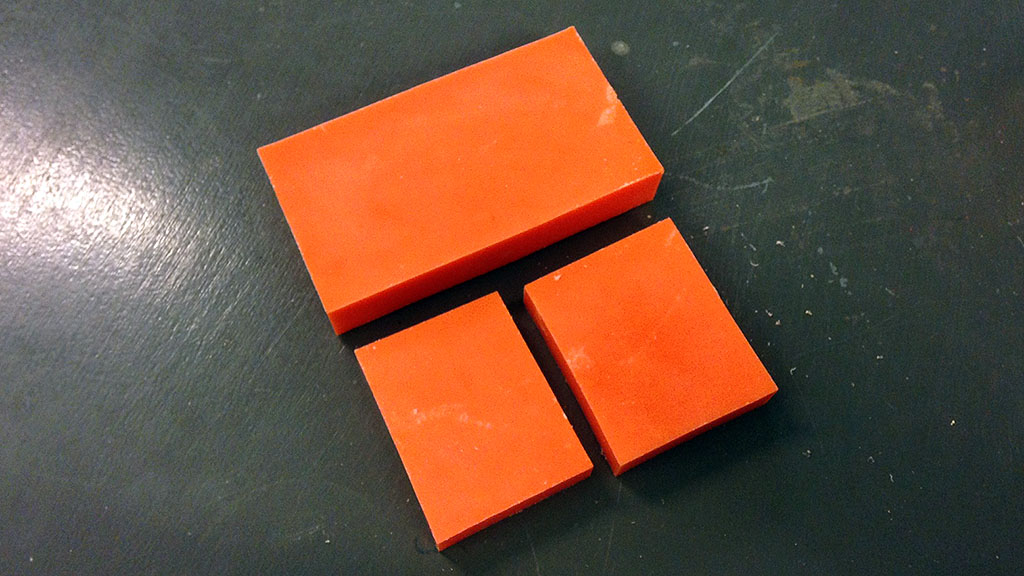
Machinable Wax: End Result

The moulds we used in this first instance worked perfectly in terms of standing up to the heat, but not so perfectly in that they don’t have a flat bottom. The second batch we ran a few days later used a £2 metal loaf tin from ASDA. While it took a lot longer to cool down the result was a very flat base: one less edge to trim on the bandsaw.

It’s relatively time consuming to make given that the fryer needs to be monitored for impending fire but the raw materials are very cheap in bulk. The end result is much more brittle than say, a candle.

The wax is currently pending an in-depth test on the CNC machine, watch this space to find out how it performs!

Posted in CNC | 6 Comments

Sphere making on the lathe

sphere2

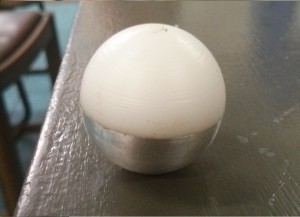
completed sphere- half delrin, half aluminium just because.

A few months ago a few of us went to the Harrogate engineering show. We failed to convince Joran to use his new credit card to buy us a new milling machine but we did all come back with moderate damage to our wallets and new toys/ tools donated the workshop. Chiefly amongst them we have milling tools and a rounding tool for the metal lathe.

With the rounding tool someone asked can you make a sphere and I wanted to prove the answer was yes, kind of. It has to be done in two parts so I made one half of of aluminium and the other out of delrin. Delrin being a self lubricating lathe-able plastic that is relatively tough. Now the rounding tool is simple to use but tricky to get the precise right size for what you want. So the fact that my two halve match up perfectly certainly has some measure of luck involved, the fact it was done by me means there was a lot of luck involved.

sphere halves

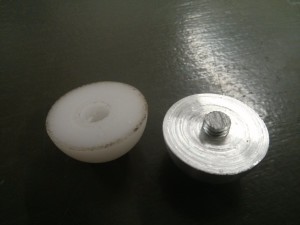
The two halves before epoxy.

The idea was to round off the end of a bar, shorten the bar, drill a hole down the centre it and tread the hole then chop off the rounded end precisely to get a nice hemisphere. So in an ideal world I would end up with two hemispheres of the same size where the threads would line up perfectly so a threaded rod could hold them together. Unfortunately my limited luck and skill ran out leading to an offset of over 1mm. So I drilled out the hole in the delrin so the rod would not touch the side when the hemispheres were lined up and applied lots of exopy resin adhesive. A few hours of drying later and I have a sphere. In time I want to vinyl cut a mask for the aluminium side and acid etch it but for now I have been distracted by another project I hope to post about soon.

Thanks (as almost always) to Nav on helping me on some of the tricky bits.

Want to try working with delrin? We brought some back from the engineering show including some cheap offcuts to play with.

Never used the lathe before? Its a lit of fun even if you don’t have a practical end in mind. Speak to Nav or Aiden for an induction as we want to get more people into using it because we know how satisfying it is to work with.

Posted in Lathe | 1 Comment

What price on priceless?

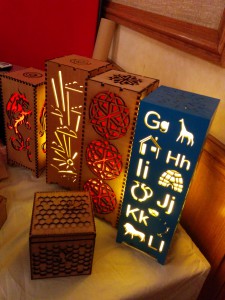
Given our shiny laser cutter, we’ve all been finding things to make with it, from desk ornaments to lens cases. Whilst I was wandering around the uk board games expo I spotted a stall selling laser-cut assortments, including lamps such as the ones in this photo:

Stand at the expo

Stand at the expo

I wanted to make myself a lamp based on these but pulling from my favourite computer games, much as I have seen on a tee-shirt I own that pulls from the Zelda games (I eventually found this later – http://www.zeldauniverse.net/2013/12/09/qwertee-offering-zelda-themed-t-shirt-for-a-limited-time/ ). I started by trying to find the teeshirt in question to see how they did it and happened upon a portal tee-shirt :

https://www.qwertee.com/product/aperture-science-testing-since-1947

https://www.qwertee.com/product/aperture-science-testing-since-1947

https://www.qwertee.com/product/aperture-science-testing-since-1947

This caught my attention and I decided that actually a lamp based on this would make a wonderful father’s day gift. A couple of years ago I bought a whole load of small portal-related items for my dad and doubled the quantities so I could have them too! This year I have done the same as I made myself a lamp and him one too.

I sat down with the boxmaker and took inspiration from the tee-shirt to create the lamp I imagined in my mind, and in one afternoon created the base lamp. Then the next week repurposed some very cheap RGB LED strip lighting into an LED light stick for the centre and cut the second lamp.

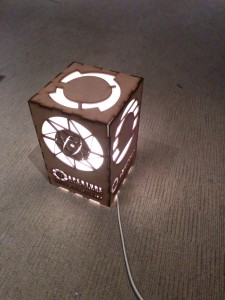
The total cost of parts given we had some MDF stock and translucent perspex lying around in the space was probably in the realms of £10 and a day’s work for me (soldering the light stick was more effort than designing and cutting the lamp). The resultant present however is unique and a thing of geeky beauty. This photo really doesn’t do it justice and is simply a normal lamp inside not the finished RGB item but hey, it’s still awesome.

Final lamp

Final lamp

My next steps are to wifi-enable my own lamp so it can do clever things like turn on when I arrive home, glow appropriate colours when I receive mail or am mentioned in irc, when a new TV show is downloaded or for other events such as the hackspace being open.

All of this would not have been possible had I not been a hackspace member, and I am happy to pay my membership fee knowing how much I enjoy making these things and the reactions I get from people I give them to.

Posted in Laser Cutter, Uncategorized | Tagged , , | Leave a comment

Parametric Cases in OpenSCAD

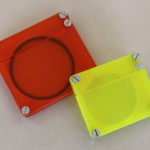
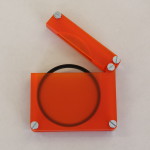
I’ve recently got back into photography and one thing that was really annoying me was the packaging that filters are shipped in – it simply doesn’t make a decent case for storing the filter when not in use, so I set about designing something nicer in LibreCAD. Once I had a working design it occurred to me that editing it for each filter size I wanted was going to be a real pain, so I decided to investigate OpenSCAD.

Unlike “ordinary” CAD software OpenSCAD is basically a programming language. You can script the design of your object using basic primatives to lay it out combined with functions like union and difference to blend them together and chop bits out. Because its a scripting language you can also use variables to define parts of your design, so for example in this project I can set the filter size I want to store, and the size of screws I want to use to fix it all together, this results in an output DXF file just like my original from LibreCAD, but customised with the options I selected. Its a lot more work to start with, but I can now  generate cases of any size in seconds.

FilterCasesFilterCaseOpenThe OpenSCAD source file for these can be obtained from thingiverse.

Posted in Laser Cutter, Projects | 1 Comment

Recent improvements

Few posts here for three months implies nothing much as happened.

In reality we have been working hard to make the hackspace more awesome.wall and bench

Our partition wall to separate off the workshop now has 78% more wall. We have also bought shelving, dust extraction and a door for it and they just need fitting.

Speaking of the workshop we now have 488cm more workbench, a drastic improvement over the random couple of the tables we had been using.

If you have beenew bench tooledn to the hackspace in the last 2 months you will have noticed out toilet roof was falling in, this has fixed professionally so we hope to have the vinyl flooring in soon and the toilet generally spruced up.

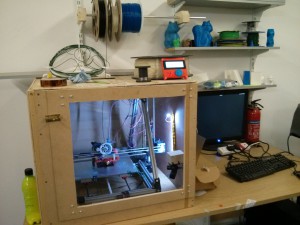
The 3D printer has 100% more enclosure, with camera and LED strip lighting so you can watch you 30 hour long 3D prints fail disappointingly from the comfort of your own home. Unfortunately we don’t yet have a way of stopping the print from afar leaving you powerless do do anything but watch it fail from the comfort of your own home but progress, right? The printer also 3dprinterhas a new control panel to print from a SD card or control the printer in a new improved way. Want to be inducted? See Joran or Japoteg.

It was said we needed a kitchen, so we built a kitchen

Mostly.

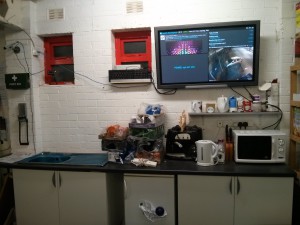
OK so we have an ongoing issue of nothing being quite finished but we are working hard to finish these things off and all the kitchen needs now is a little plumbing to get running water.

sauronHanging over the kitchen is Sauron (the all seeing). He shows us the latest tweets, emails form the of Google group and will soon (yes its not finished) show off the latest in out IRC chatroom. Most importantly he cycles through our camera feeds, most importantly the outside ones overlooking our entrance and the car park which have been upgraded and lighting improved.

We have added a heat press to out list of big tools, useful for making custom T-shirts after creating your design on the vinyl cutter.

Why not see for yourself? Come visit us on one of our open nights 7pm every Tuesday night

We will try and do an update on some people’s personal projects soon too.

Oh and expect an update about the laser cutter in a weeks time.

Posted in Uncategorized | Leave a comment

Workshop changes

Hackspace workshop

Hackspace workshop

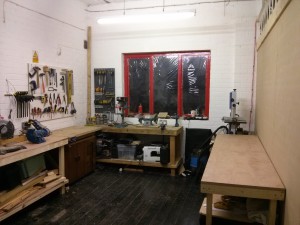
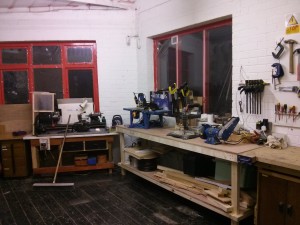
Those of you who’ve been to the hackspace in the last week will have noticed that new workbenches have been installed in the workshop. There’s a shelf for storage beneath each bench and which should allow the vast majority of equipment in there to have a permanent (and tidy!) home. We’ve also boarded the workshop side of the partition wall and there’ll be some shelves appearing on that wall over the next week or two for the storage of smaller things like boxes of screws & plugs, nails etc.

Enjoy your workshop, and make cool stuff!

Posted in Blog, Kit | Leave a comment