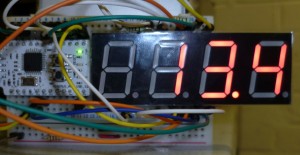
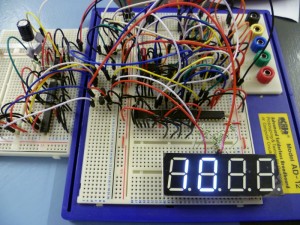
As anyone who’s been to the hackspace recently will know, it’s often not the warmest place. This has led to some members becoming a bit obsessed with temperature sensors. Our resident bot already has a temperature sensor, but we had our suspicions about its accuracy, and it doesn’t have a convenient readout.
I recently acquired a nice 1″x4digit 7-segment LED displays. Unfortunately these came without datasheet, so the first task was to reverse-engineer the pinout. It turns out they aren’t 5v tolerant. Applying 5v causes the segment to briefly glow orange, followed by the release of magic smoke. After installing some limiting resistors I figured out the wiring for the remaining 3.5 digits!
This combined with a minimus (small arduino-like microcontroller) and a DS18B20 temperature sensor gives in a handy self-contained temperature readout. About the only notable oddness is I chose to multiplex round the segments rather than across the digits.
This all seemed a bit too easy. We’ve recently had a big pile of discrete logic chips donated (mostly 74 series). A digital temperature sensor seemed like a reasonable project to make use of them. i.e. replicate the device above without using a micro-controller.
The design is constructed as follows:
- A thermistor in voltage divider, driving the analog input of an ADC0804.
- An 8-bit (dual 4-bit ripple connected 74LS191) binary count-down counter. Load with the ADC output value. Clock gated on zero detect.
- Dual 4-bit BCD counter (CD4518 in ripple configuration). Counts up from zero synchronously with the count-down counter.
- Dual 4-bit tri-state buffer (74LS244) multiplexing BCD counter output onto BCD 7-segment driver (CD4511).
- Common cathode 4-digit (2 used) 7-segment display with N-channel MOSFET (BS170) drivers on the cathodes.
- Control logic consisting of 2-bit counter (74LS191, bit 2->reset) feeding 2-to-4 address decoder (74F138). The 4 outputs trigger the ADC conversion, counter reload, and two display digits in turn.
- 30KHz 555 based oscillator clock input to ADC and counters.
- 200Hz 555 oscillator clock input to control logic.
- Misc NOT (4069) and AND (7400) gates.
A few issues encountered along the way:
- It’s worth trimming the legs on capacitors and resistors before plugging them into breadboard. Otherwise adjacent long-legged components are liable to short together causing intermittent hard to debug failures.
- The oscillators are quite noisy. It’s important to have sufficient power supply decoupling/smoothing capacitors, especially on long supply rails.
- I initially got the clock polarity wrong for the count-up timer. This resulted in a race between the active clock edge and the reset/enable signals. Inverting the clock signal gave a stable count.
- My nice jumper wires are slightly more than 0.1″ diameter. i.e. they don’t quite fit in adjacent breadboard sockets. After a while I ended up just using lengths of solid core equipment wire.
- Logic analyzers are really handy. I don’t have one but bodged together a cheap one using a Minimus/Arduino. It’s not fancy, but more than sufficient for debugging 30KHz signals.
There are two multi-turn potentiometers for adjustment. The first sets the zero point via the ADC negative input. The second forms the potential divider with the thermistor, and allows the scale to be adjusted. While the temperature response is nonlinear, within a small range (say 0-30°C) it’s not too far off.
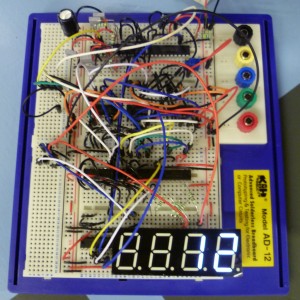
The finished build spans two and a half large (~1200 hole) breadboards, and runs off a 5v supply. It displays positive temperatures to within about a degree.
Update: A bit of rewiring and it now fits on a single (large) board.


Hi, i am trying to use sn74ls190, but wondering how to set the clock.. how do u do for manual clocking (i meant by using push button)
Did u poblish the circuit diagram?