With our new laser cutter being purchased I thought it about time to finish of a post about what I did with the last one.

The full shogi set
Shogi is a Japanese variant of chess and unfortunately it is difficult to get a set without importing it so making it seemed a good option and with access to the laser cutter this actually became quite feasible.
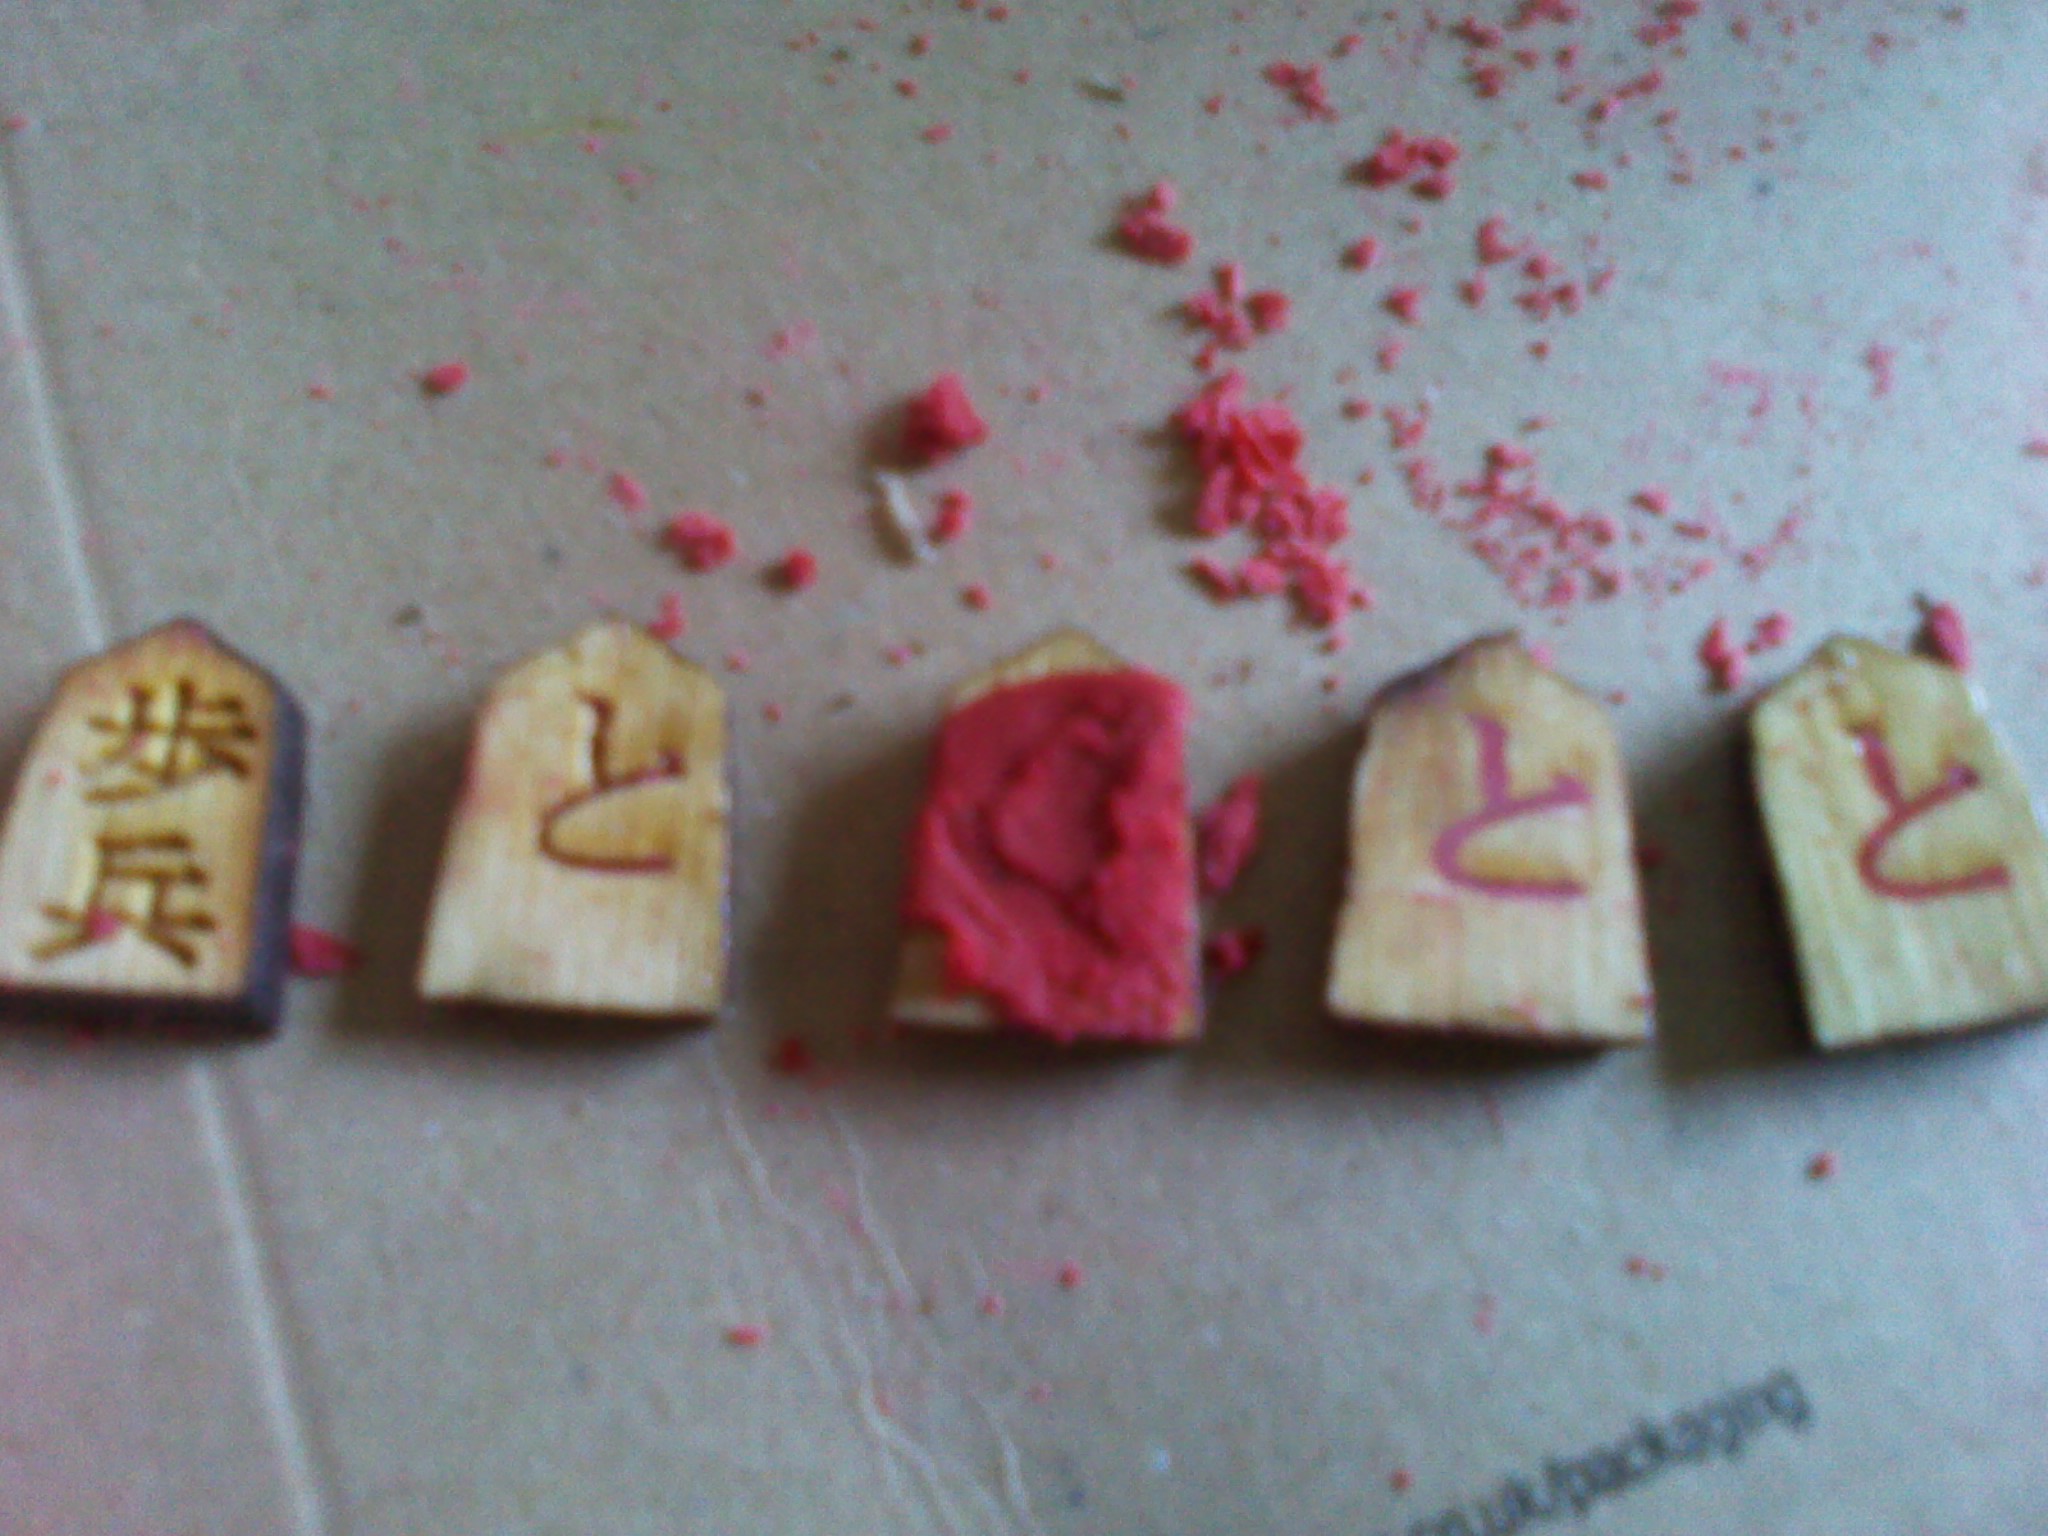
The pieces are pentagons – easy enough to design, with a kanji symbol engraved into it- cant be too hard right? The kanji goes on both sides- which makes things harder, and one of the kanji for each piece should be red- which would take some experimentation.
Using wikipedia as a source of the kanji I started by jumping through a number of hoops: grabbing the images, putting them in inkscape, tracing a bitmap of the image and exporting it to newlydraw which resulted in rough but passable results. Some more fiddling later, I found a better way was to copy the kanji directly into newlydraw, though this involved changing the non-unicode language settings.
To engrave on both sides I set up two files in newlydraw. One would cut out the pentagon shapes and engrave one of the kanji. The other file would have the corresponding kanji lines up to print in exactly the same place as their counterparts. Each file would have a small square in the upper right hand corner to account for newlydraw counting whichever first image of the top left is to be 0,0,0.
As usual a bit of faff and practice cutting was needed to I would get clean cuts and a deep clear engraving.
The sheet of wood that would make the pieces was taped down securely to the bed and the first pass of cutting and engraving done. Then I lifted the pieces out one by one with blue-tac, flipped them over and replaced them so the original sheet could be used for a template for the second pass.
Left to right: Just out of the laser cutter, varnished, wax applied, excess was removed, mover varnished for the finish.
To add the colour I tried first with paint but it spread and stained the rest of the wood too easily and clean-up proved end up ruining the engraving. Fortunately some of the other members gave me a tip about using wax. I prepared the surface first with a couple of layers of varnish. With the crayon roughly crushed I put in a small metal dish and gently heated it on a hot plate. I was able to scoop it up and apply with the back of a spoon. When it had dried I scraped off the excess with a knife and re-varnished to seal it in which had the benefit that also deepened and brought out the colour.
The board itself was simpler with just engraving a cross hatch pattern. I made a small wooden frame, and hinged it so I could fold it up with the pieces stored insid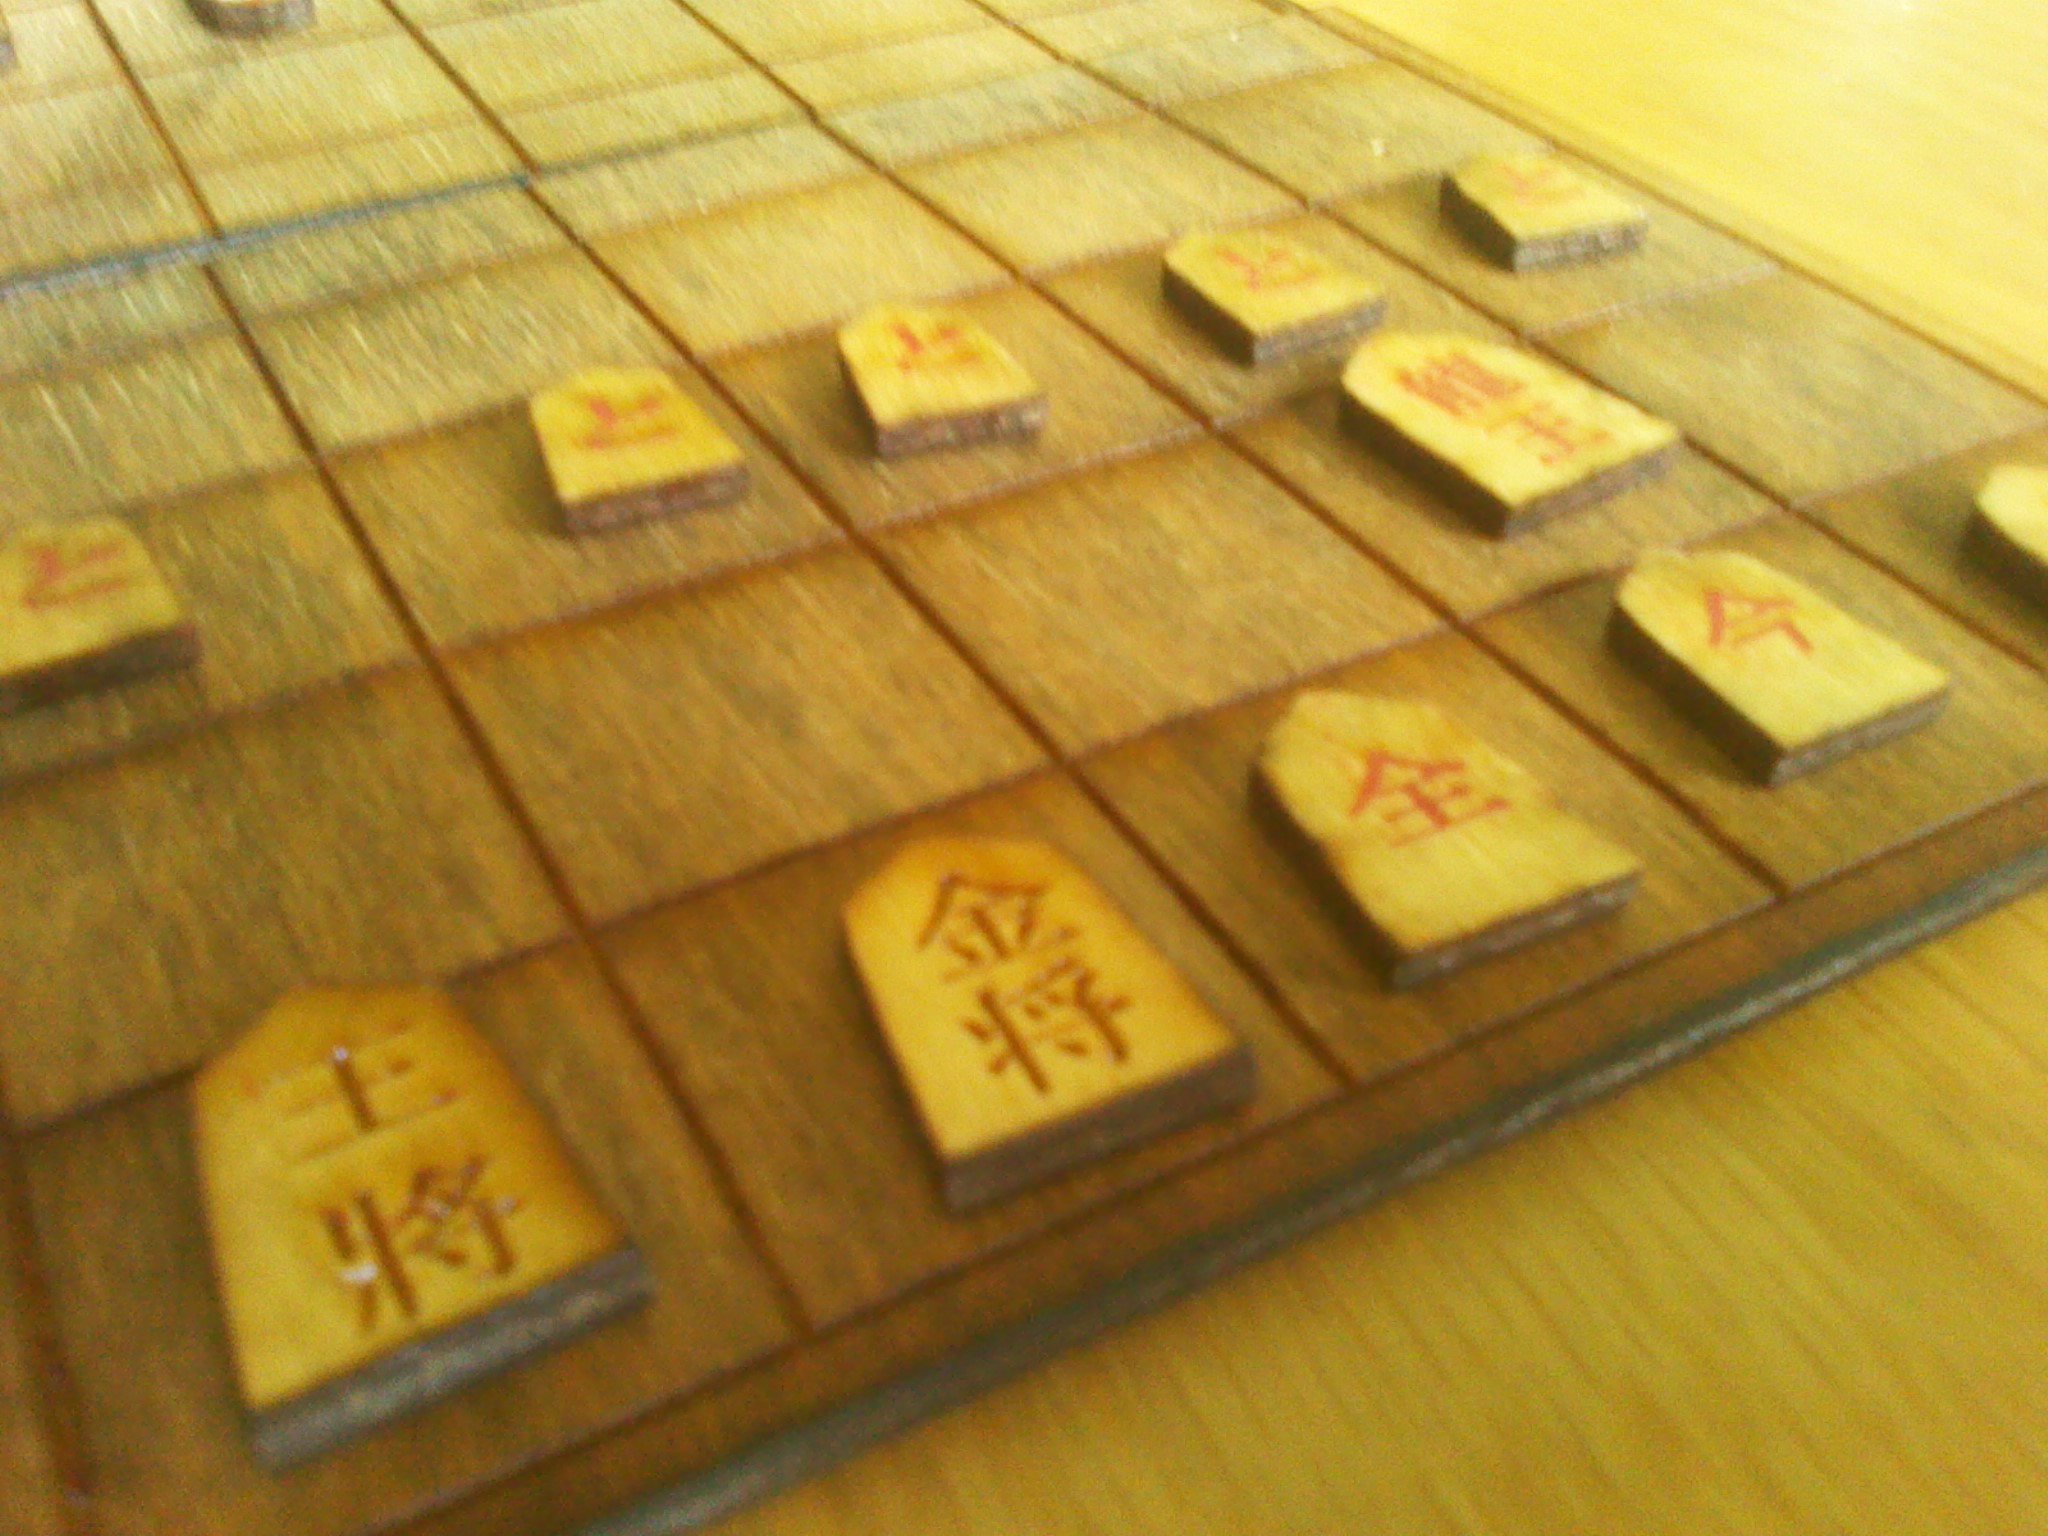 e.
e.
Anyone for a game?
That look pretty smart. Nice one I’ll have to look up that game but I’m no good anything involving any kind of strategy.
Maybe next time do the cutting after you’ve printed the reverse side? saves having to take each bit out one by one and flipping them?